Inside Forge’s Sci-Fi Lab Part II: Environment Assembly & Final Touches
Following up on our first deep dive into Forge Studios’ internal sci-fi environment project, we are excited to bring you the second instalment in this behind-the-scenes series.
In Part I, we explored concept development, artistic direction, asset production. This is also where our team came together to push boundaries, test techniques, and unleash their creativity. Instead of diving straight into production, we took a more deliberate path, which aligned on a strong concept and a unified creative vision.
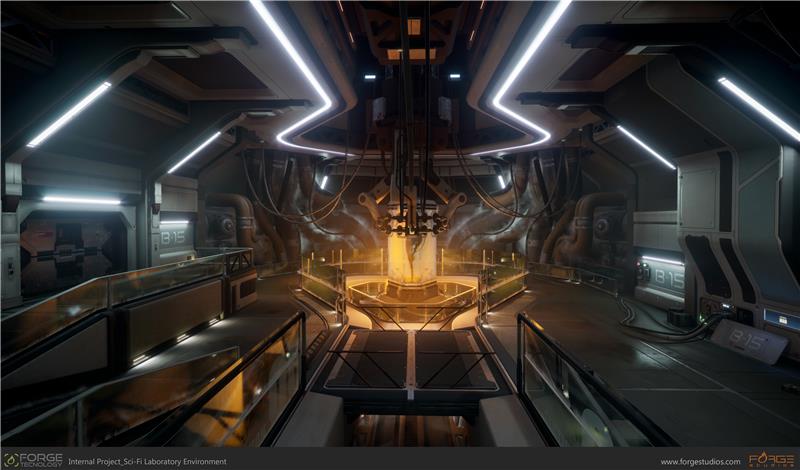
Now, in Part II, we’ll walk you through how our ideas evolved into a finished environment within Unreal, covering environment assembly, lighting choices, optimisation, and the final polish that tied it all together.
Just like the previous article, each phase is explored in detail with direct insights from the artists who shaped the result:
- Jeroen Jansen, Lead Environment Artist
- Gianluca Rolli, Lead Concept Artist
- Fabio Nuzzo, 3D Artist Supervisor
- Daniele Gasparini, Lighting Artist
Special thanks also to the wider team whose contributions made this project possible:
Davide Brunotti, Stefano Ahmed, Vincenzo Dante Colangelo, Annamaria D’Arienzo, and Michele Crescenzi.
Let’s start!
Building the environment: tools & teamwork
How did the team approach building up the scene while developing individual assets?
Jeroen: We used several features in Unreal to enable collaborative work. The environment was split into separate levels with each artist owning one. These were merged into a persistent level whenever needed. This setup allowed everyone to work in parallel without overlap or conflicts.
File versioning was also critical. We used Tortoise SVN, which integrates easily with Unreal. It gave us peace of mind knowing we could always revert to the previous state if something went wrong.
Fabio: Creating a believable environment isn’t easy, but with the right structure, it’s achievable. We started with strong concept art and a rough blockout, then gradually refined the scene from large shapes to fine details, always guided by technical analysis. Lighting was a key focus, helping to establish mood and storytelling. But beyond visuals, every asset had to serve a purpose. We constantly asked: Why is this here? What story does it tell?
The scene evolved as we worked thanks to open collaboration. We had a shared vision, understood our technical limits, and brought it all to life piece by piece.
Were there aspects of the project that helped you grow or expand your skill set?
Jeroen: I’ve worked with Unreal before, but this project pushed me into deeper technical territory. From setting up the project to managing integrations like Houdini, it was a great learning experience. I also started using AI to help create python scripts for Unreal. For example, being able to set up a path to source files with a single click.
Fabio: Definitely! There were plenty of learning opportunities during this project. Aside from the Unreal Shader System, I got back into Substance Designer. This is a tool I love, especially for creating tile textures. In past projects, I mainly handled modelling, sculpting and unique asset texturing. Here, I used spline nodes and others to create decals and variations across the environment. It was both educational and fun – I couldn’t ask for anything better!
Rethinking workflow: what aspects of the project challenged you to rethink your usual setup?
Jeroen: I’m always looking to evolve my workflow. That doesn’t mean abandoning what works, but being open to trying out new software or tools that add real value. Integrating Houdini did just that.
Fabio: I didn’t have to completely rethink my workflow, but I did have to juggle multiple pipelines. Most assets used face-weight normals, but some key props required RGB mask systems for detailed wear and tear. Deciding which workflow best fit which asset was key as great assets can’t be great if they can’t run well.
Collaboration & Scene Complexity
What was it like collaborating in a small team on a complex scene? Any tools or practices that helped?
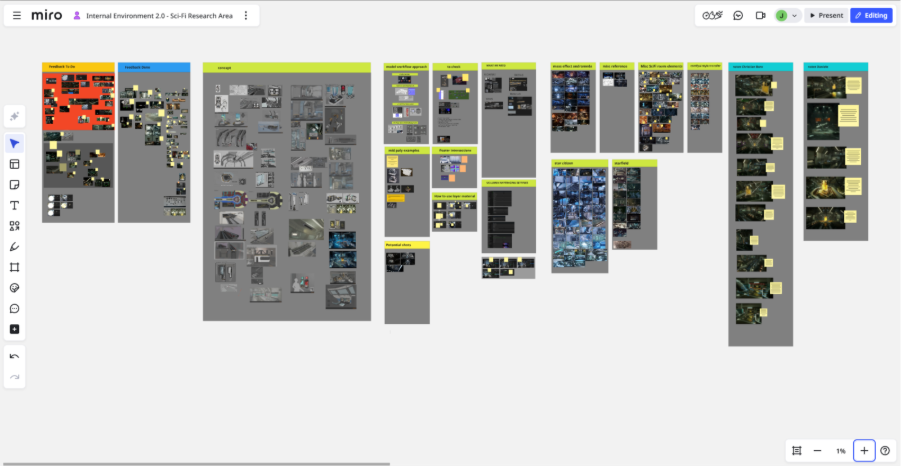
Jeroen: Small, specialized teams are our bread and butter at Forge. Each artist brought deep expertise, and the project became a melting pot of experience, creativity, and shared knowledge. What really made it work was staying organized. We used Miro, which is like a whiteboard on steroids. It helped centralised references, documentation, and feedback.

We also mapped out network drives to match file paths across the team and used version control to stay synced.
Fabio: Teamwork made everything easier. Each of us had clear responsibilities. I focused on shaders and materials, modelled some assets, and co-supervised the modelling team with Jeroen.
More importantly, communication was the biggest success driver. Constantly solving problems and filling each other’s knowledge gaps made the experience productive and enjoyable.
Lighting the Scene
Daniele, thanks for joining us! Can you walk us through how your lighting choices support the scene’s mood?
Daniele: Lighting isn’t just about visibility. it’s about storytelling and emotion.
I used soft, directional light to add depth to the scene and create a sense of intimacy, guiding the viewer’s eyes without overwhelming the scene. We balanced warm and cool tones depending on the emotion impact we wanted. Warm tones to convey energy or heat, and cooler tones to convey calm or tension.
Every light, its angle, and its intensity were made to support the narrative. For me, light is a storytelling tool, and if the viewer feels something, I know I’ve done my job.

What technical or workflow challenges came up as you brought the scene together? How did the team work through them?
Daniele: Balancing visual quality and performance was a big one. Working with high-resolution assets and complex lighting setups often pushed the limits of my machine, so optimizing without compromising the aesthetic was a constant effort.
Colour consistency across different render passes and software exports was another hurdle. It took constant calibration and communication to make sure everything stayed visually cohesive.
Fabio: Streamlining the shaders I had previously prepared. I reduced complexity to lighten performance without sacrificing too much quality. Unreal’s performance monitoring tools were a huge help here.
Gianluca: My biggest technical challenge was modularity, making sure each individual piece worked on its own and as part of the whole. That meant constant discussion about layout, materials, and integration.
Jeroen: Initially, we aimed for full-time rendering with ray tracing and dynamic lighting but performance took a hit. We then switched to a baked lighting solution, which meant reworking UVs, lightmaps, and project settings. Another issue was translucency; fog, glass, particles don’t always play nicely together. Without a graphics engineer at hand, we had to get creative to make it production ready.
Final Passes & Optimisation
What refinements or optimisation steps did you take as the scene neared completion?
Jeroen: Some assets got extra polish, textures were refined, and lighting and composition were adjusted. We also cleaned up lightmap UV issues, fixed material issues.
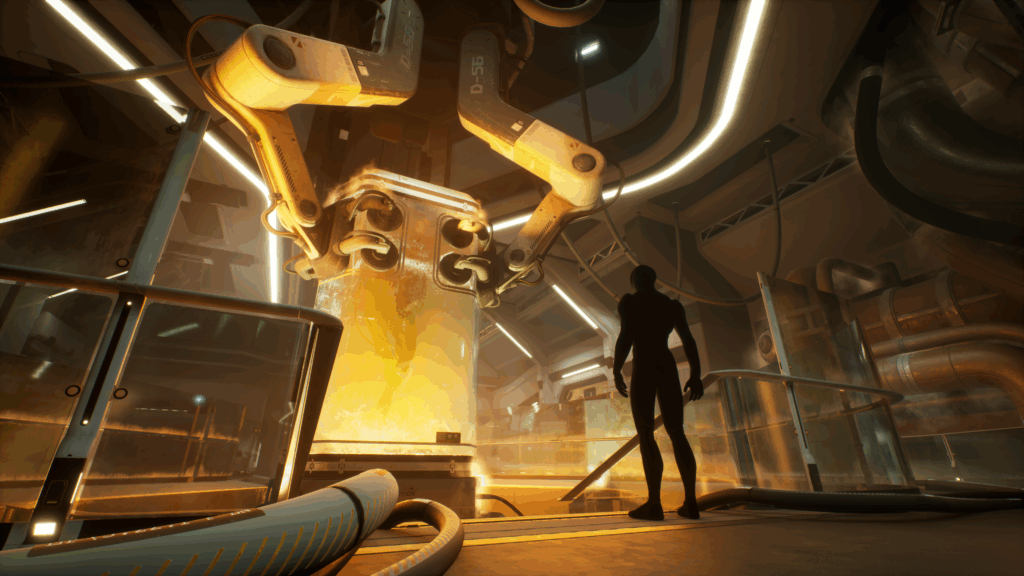
Fabio: At this point, we asked ourselves “how do we push this even further.” We first identified the assets that we could do this with such as the capsule containing the alien, then the environment more lived-in. We wanted a “calm before the storm” vibe. That meant, subtle wear, clutter, and signs of human activity – small details like scratches or screen graphics that made the space feel alive and charged with tension!

How did you decide what to prioritise in the final stages?
Jeroen: With a looming deadline, we focused on high impact, low-effort changes. Tweaks need to make a visible difference without taking too much time. Anything front and centre in the scene got immediate attention.
Fabio: Storytelling, and assets that played a key role in that was the priority. Meanwhile, I took the chance to refine smaller details, giving the monitors an old CRT look. It’s a subtle touch, but it helped anchor the environment in a believable world.
Final Reflections
What are you most proud of?
Fabio: Finally, getting my hands on the Unreal shader system, and being able to create tile textures, and stepping into a supervisory role for the first time. Both working on and watching the team bring our assets to life has been incredibly satisfying.
Jeroen: Although my direct art contribution has been small, I’m proud of how the team came together. Managing a project like this and seeing it evolve is always gives me great joy. I also had time to explore new workflows, techniques and tools, which I normally wouldn’t be able to do.
Gianluca: The atmosphere we achieved. It took time, but we ultimately brought what we imagined to life. I am especially happy with how the main elements (from the pod to the mechanical arm) turned out.
Looking ahead
Anything you would do differently if you could go back?
Fabio: Not really. Every project is a learning opportunity, so I prefer to take what I’ve learned and bring it into the next project.
Jeroen: The reality is you can’t go back, and that’s fine. As with any dev project, there were ups and downs, but we managed. The lessons we learned from this experience will guide future decisions.
Gianluca: In hindsight, we had too many great ideas early on, which slowed down pre-production. I would aim for faster alignment upfront.
What new insights will influence your next projects?
Fabio: I’m even more technically aware now, especially around shaders and optimisation. Ironically, it’s the limitations that spark creativity. Finding ways to either overcome or work within those limits is what makes this exciting.
Jeroen: I’ll keep exploring AI and procedural tools like Houdini. They bring flexibility, variation, scalability. I’m a strong believer that they will transform how we generate art in the coming years.
Gianluca: Aside from lab designs, better communication tools, like shared boards, really boosted our workflow. We’ll absolutely carry that into future projects.
That’s a wrap
This second phase was all about building on the creative and technical foundation we laid in Part I. From layout and lighting to final polish and optimisation, every detail brought the Forge Sci-Fi Lab to life in Unreal Engine.
Check out more of the project on Art Station, and if you would like to work together, reach out at business@forgestudios.com.